The Mitten is such a classic book to teach in the primary grades. There is SO much you can get out of it, yet it seems like we tend to stick to the basics: sequencing events. I wanted to shake it up a bit and show you some comprehension activities you could do with this lovable book that require other, more complicated, comprehension skills.
Two goals I have for these activities are to (1) dig deeper with this well-loved book and (2) provide enough support for my students to be successful so that they can transfer these skills later.
Analyze characters in the Mitten
One difference in Jan Brett's version of The Mitten that stood out to me was why the animals agreed to make room for the other animals in the mitten. In the older version by Alvin Tresselt, the animals make room because it is cold out and they are kind animals, worried about the other animals. In Jan Brett's version, she using descriptive language to show the reader why the animals in the mitten may feel like they have to make room. The owl has "glinty talons" and the fox has "shiny teeth."
1. These are these great examples of adjectives to share with our kids!
2. We can dig deeper by asking our students how those descriptive details help the reader understand the characters in the mitten. What if Jan Brett just were to say, "The mole was afraid of the rabbit so he moved over," or "The animals knew the fox could eat them."
3. Point out the inferences that need to be made. Explain to your students that we need to make an inference that the animals are scared in order to understand why they moved over. Point out that Jan Brett's description of these animals' predatory traits are actually text evidence for us.
4. Make it into a writing activity that can be scaffolded.
Here is how I would do this activity in class.
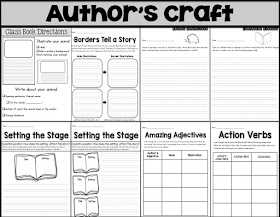
If you are interested in the printable shown above, it is part of my enormous Jan Brett unit. This unit has several activities like this one. To see more about this unit, click HERE.
Comparing Jan Brett's version of The Mitten to another version
Another way to dig deeper while providing enough scaffolding to ensure student success is with comparing Jan Brett's version of The Mitten with another version.
If your students need support with finding similarities and differences, make it a whole-class collaborative activity:
- You can use sentence strips or try using these laminated strips. I just laminate paper and cut it into strips of different sizes. Place a magnetic dot on the back. (Keep in mind since they are laminated, you can reuse them for other Venn Diagrams.)
- Then I draw a huge Venn Diagram on my magnetic white board.
- Guide students in finding similarities and differences. Ask if the characters were the same, then ask if the events were sequenced the same. Go through the beginning, middle, and end of the stories and look for similarities and differences.
- As you find these similarities and differences, have students write them on the sentence strips using white board marker.
- As a class, place them on the Venn Diagram.
If your students have already had some practice with finding similarities and differences, then you can still provide some scaffolding with prepared sentence strips, like below. Here, students don't have to come up with all the ideas on their own, but the DO have to determine where they belong on the Venn Diagram.
Here is just another graphic organizer you could use. Here, students will go through both stories, listing characters, events from the beginning, middle, and end, and any other important details. Then they will highlight things that are the same about each story. This helps to support comparing stories while maintaining a sequence, which may help when they have to write about it.
Using different writing frames may also help your students to get their ideas out in an organized way. Most often, my students are able to sort similarities and differences, but then they have no idea how to communicate these ideas. By providing this scaffolding frame for them, we open the door to understanding and success on future comparison assignments. We provide our students with the structure and language they need. Here, I've shown two different formats: one shows differences and the other shows similarities. I have another that has both similarities and differences.
This last version is for more experienced writers who have already had practice with the writing frames. I still provided support in the form of sentence stems (pictured below left) and organization (middle page.) Students can refer to these resources while writing their papers. Please note that you will need to teach them how to effectively use these. :)
You can find these resources HERE.
Some other Mitten activities in this unit:
And other activities from this pack:


It’s hard to find knowledgeable people on this topic, but you sound like you know what you’re talking about! Thanks
ReplyDeleteClick Here
Spreaker.com